Showing posts with label farm. Show all posts

Sunday, November 3, 2013

Odds and Ends...

This next week is kind f an odd week for my theme and things.  We are finished with Halloween and pumpkins, but it's too early to start thanksgiving, so we are going to be doing some odds and ends projects.  I have a few left over scarecrow projects and fall activities, but I really don't have many creative ideas... anyone out there have anything for me this week?
Here are some things from the past couple of weeks that went well:
Some simple fall décor:


Paint a paper plate orange, add a leaf and stem and you're finished!
 
This is a simple pumpkin shape project that we made.  It's a 5x6" rectangle for the orange pumpkin 2x1" stem and a 2x3" green leaf.  I gave them a black strip of paper to make their own face.  Some of them were interesting, but I forgot to take a picture before I sent them home with the students.


Leaf wind socks.  I just cut construction paper in half long ways for the base.  The strips are 1" by about 4" because I'm tall and don't like hitting my head on them all day.  There are tons of leaf patterns to color and cut in google images.
 
This is another shape art project.  We read 5 little pumpkins and then acted out the story.  We also did a youtube video of the story which the kids loved.

 
Here's the youtube video:
 
From a couple of weeks ago you can see our Mrs. Wishy Washy bulletin board.  We colored and cut out animals, then we added "mud" by mixing brown paint and shaving cream.  It dries fluffy like mud and the kids loved it.

 
Going along with our farm unit a couple of weeks ago we graphed our favorite farm animals.  I like to always asks the students "what can you tell me about the graph" and then record what they tell me. 

 
For the letter Pp we made our own pizzas!  This is one of my favorite projects.  The students each made their own paper plate pizza with their favorite pizza toppings.  We then graphed as a class which toppings they liked on their pizza.  They loved this project as much as I do, and it's a great bulletin board when you're finished!

 
With our fall unit we did spider color graphing.  Each student has their own graph at their desks and take turns coming up to pick out a spider.   You can click the image below to get the worksheet.

 
this is something from the Mrs. Ricca pack that I posted about earlier. 

 
And this is a super easy center that the students were amazed by.  You can print any type of image and then trace over them with puff paint.  They will then turn into stencils great for rubbings.  We did real rubbings as well with leaves we found outside, but these seem to show up better and the students were amazed.

 
Here are some of my fall products in the TPT store:
 

http://www.teacherspayteachers.com/Product/Fall-Autumn-Math-and-Literacy-Centers-848363

http://www.teacherspayteachers.com/Product/Fall-Count-the-Room-Math-Center-876781

http://www.teacherspayteachers.com/Product/Fall-Tally-Mark-Count-Math-Center-876798

http://www.teacherspayteachers.com/Product/Fall-Autumn-Write-the-Room-841958

 photo sihnatureagain_zps9d307b1b.jpg

Wednesday, October 9, 2013

Mrs. Wishy Washy


Continuing with the Farm:
We are reading the story of Mrs. Wishy Washy.  The class loves this story and the old tape that goes along with it.  So far we have done 2 Mrs. Wishy Washy projects.  This first project tells a lot about my class and students.  Some of them turned out so cute:
While others....  Well we are still working hard at following directions.

 There are some cute projects such as this Mrs. Wishy Washy cut and past at makinglearningfun.com.  You can click http://makinglearningfun.com/themepages/WishyWashyCutandGlue.htm to get the pieces to make Mrs. Wishy Washy.  I printed them and traced around the pieces to help with the cutting problems we encounter.  She turned out cute and the kids could then act out the story at home.

My class loved this Mrs. Wishy Washy:

Here are the paper sizes and the directions:
background: 18" x 20" paper
Body: 1 blue rectangle 5"x9"
Head: 1 tan square 4"x4"
Arms: 1 Blue rectangle 1 1/2" x 8"
Hands: 1 tan rectangle 2"x4"
Feet: 1 red rectable 2"x4"
Precut apron shape
Precut Bandana Shape

Directions:
Glue to blue body rectangle
Fold the Arms rectangle in half and cut on the line.
Glue on the two arems.
Fold the tan arms rectangle in half and cut on the line.  Cut off the corners of the squares to make arms.
Fold the red rectangle and cut on the line.  Cut off the corners of the squares to make red slippers.
Cut off the corners of the tan head square.  Glue on the head
Glue on the precut bandana
Glue on the precut Apron
Add details with crayons.


 photo sihnatureagain_zps9d307b1b.jpg

Monday, October 7, 2013

Rosie

Last week we continued farm and make this Rosie's Walk book to go along with the story:
Here is the cover.
We made a pocket on the barn door that we could put Rosie in.
I gave out Rosie on the last day-- It was the most exciting part.


If you would like the words for this book click here
 
I don't have the story pieces as of right now, but I'm looking into finding some like these.
 
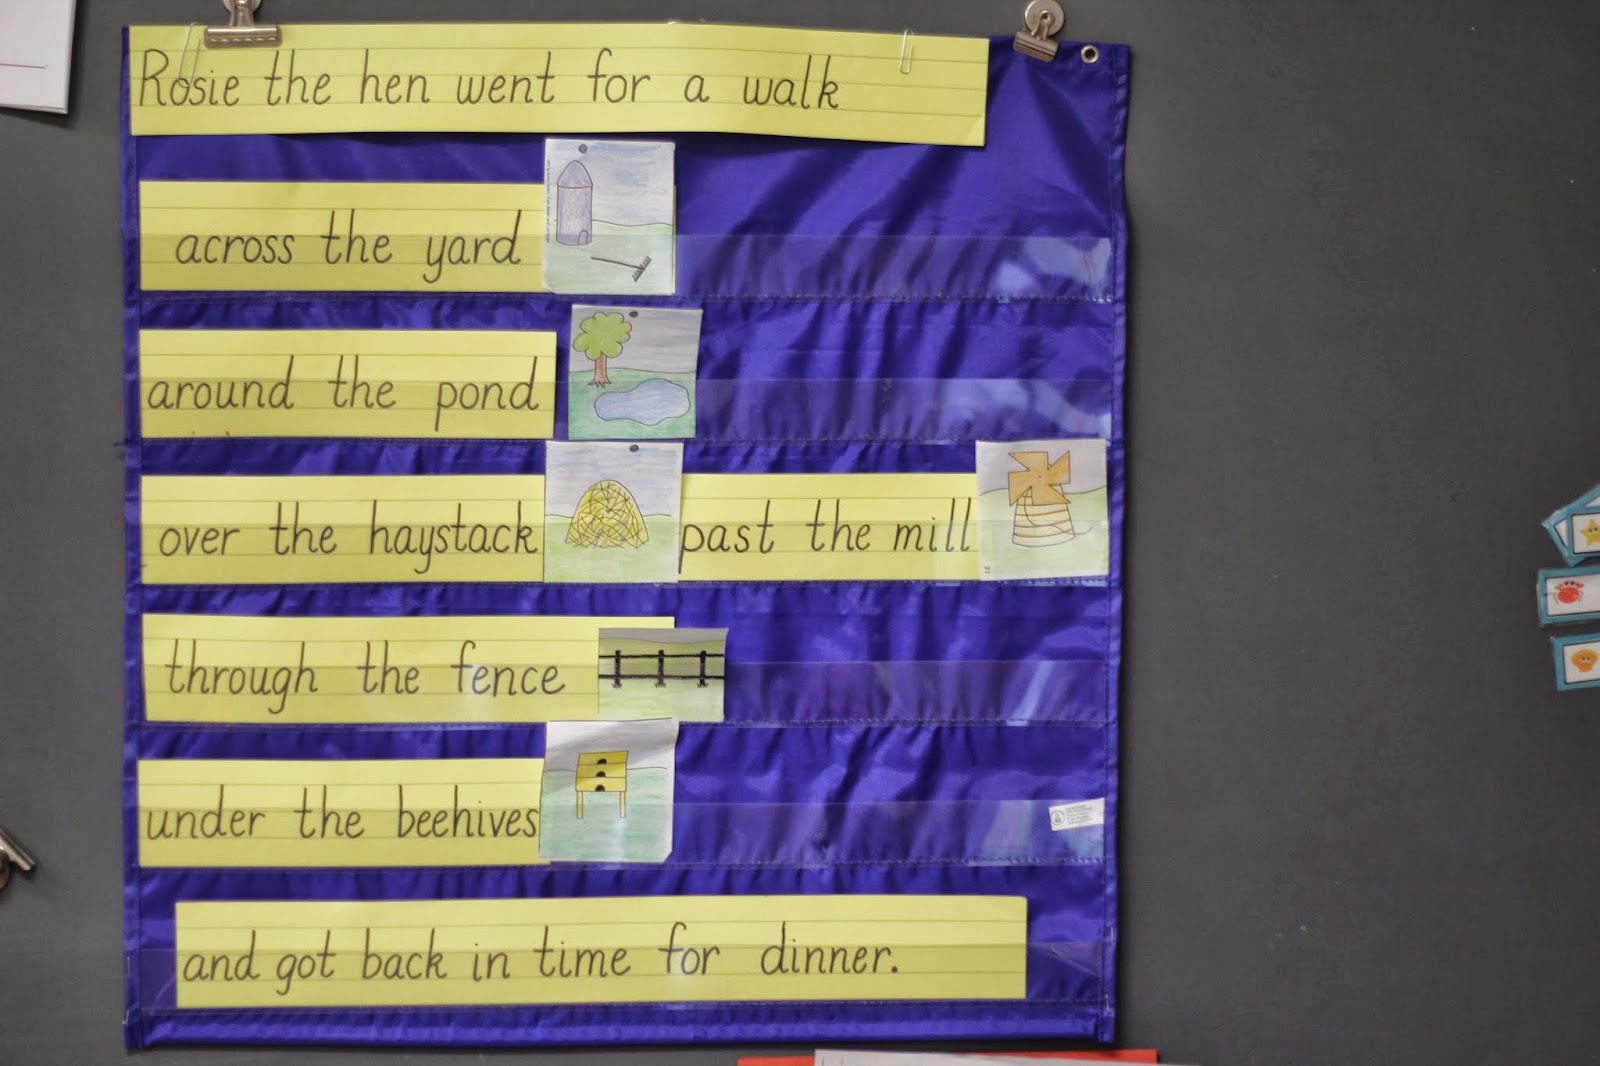
I read the book but also have the pieces in sentence strips:
 
The kids loved the story.  They were acting it out.  Even with the pumpkin spice playdoh they were making the story pieces.  I was impressed:
 
 
On a side note, my nephew was sick- but he's home and better now.  Isn't he adorable?!


We also took James to the City Museum, a great place to take your kids if you are ever in STL.  This is my husband and James when we arrived, and when we were leaving.  Do Not skip a nap to go there!


 photo sihnatureagain_zps9d307b1b.jpg

Saturday, September 28, 2013

A Long Week

This week felt like a long week.  We had a lot of stuff going on, and the kids were very excited.  We have moved onto our farm theme, a theme the kids love.  We started off the week by reading "The Farm Concert" which is a super old book from an old reading series
 
My class likes the tape that goes along with it-- although some of them asked what "it" was (a cassette tape) and what my cassette player was.  I didn't think I was that old!
 
We made a class book to go along with it.  It was super simple.  This class loves making books that they can take home and "read" to their families.
 
Here are some centers around the room:

I put corn in the sensory table.  It's harvest time so the students are already interested.  I put whole cobs or corn in there and the kids love picking it off the cob.  A normally loud center was somewhat quiet- because what kid doesn't like picking at something??
I also put cards with numbers in them where the students would put the corresponding kernels of on there.
 
We made pumpkin spice play doh.  I used a no cook recipe and added extra pumpkin spice.  I found the generic brand for cheap because pumpkin spice is expensive.  You could just use cinnamon and nutmeg or make your own spice mixture.  I got the recipe here (and doubled it) http://dawnypoo.blogspot.com/2009/10/tuesday-tutorial-no-cook-playdough.html#.Ukcb518o7mI
 
 
I had a farm book on tape in my library center, but all the students were obsessed with this old bulletin board set that I put on the front of my desk.
 
 
Here are my apple colors write the room centers at TPT
 
I also put out my first write the room center.  This was a tough one as a first write the room.  I made up baggies with the markers they would need and a pencil.  This helped them to complete the center.
 
Next weeks project:
 
They love the video:


 photo sihnatureagain_zps9d307b1b.jpg

Wednesday, July 31, 2013

Literacy Centers

I would also like to do literacy groups.  I know the teachers in my home town do "The Daily Five" and they love it.  I created some literacy games that I thought about starting this year, but probably not at the beginning of the year.  I need to do some more research on how literacy centers work.

 
Mrs. Ricca's kindergarten has a lot of literacy center ideas that I have been looking into.
 
Here are some free centers that I have in the TPT store:
 
 
Again, these are some of my first centers I created so they aren't my best work- but they are FREE!  I use them in the fall when I do my farm units.  One of my favorite centers is write the room.  You will see this if you have visited my TPT store.  I have a write the room for about every subject.  They are great and super easy to use.  The kids love them too.  I just give them a clipboard and send them on their way.  It is fun to hide the clues around the room and make them really look for them.  I also let them use fun writing utensils from time to time.  I have some crazy pen with fathers, or even just mechanical pencils kids think are really great to add a new spice to the center.
 
This is a free one on my TPT sight.  Click below to be linked to print it.
 
 
I am pretty excited about my Brown Bear write the room I just created.  My class loves this story at the beginning of year- they easily learn to read it on their own!  It is great for our color unit!